Sunday, October 21, 2012

Installing Parrot Mki9100 Bluetooth Car Kit (in Vauxhall Zafira B) Pt3 - Installing (Prep > Removal of Panels)

After all the introduction etc, it's time to take the car apart and install the kit.
This easily took over 3 hours to install if done in 1 go (personally I did it over a period of 4 days due to not enough sun light whenever I finished work and so parts of my dashboard were left off when I drove to work and back.)

First of all it was time to remove the front parts of the dashboard so that I could get the ISO connector removed of the back of the stereo (and install the SOT-122 cables and get that hidden away.)

Removal of the Stereo
1) Use the Double-DIN removal key and put it into the 2 sets of 2 holes on either side of the Stereo.
2) Pull outwards (if I remember right) and pull the stereo out, carefully.
3) The special ISO connector is 'locked' into place
    > Simply put with both hands on the middle (feels like an unlock button) then the arm slides up and the ISO can be removed.
4) The aerial connector also has a locking mechanism done by a push on one of the corners.
]
Photo of the top of the stereo (Hmm another Made in Portugal...)

Removal of the Heater Control
Once the stereo has been removed, the heater can be un-clipped and pulled out.
1) There's 2 sets of clips on the top then 2 on the bottom which will automatically un-clip when pulled slowly.
2) Remove both connecting cables (but dont yank, again they're locked in.)

Top 2 photos are the top and back of the Heater
The next 2 shows the stage up to this point.


Removal of the Front Dashboard Facial
1) Using a flat screwdriver (or plastic spatula if you don't want to leave any marks) pop a corner up.
2) Follow this through so that the top panel  is removed (just the section above the center console is needed.)
3) Once this is done, the 2 air vents at the top should be pulled out (not locked down)
4) Underneath each of these should be a screw which needs removing.
5) And before I forget the 2 screws where the heater controls were (can be seen in the above photo, bottom corners.)


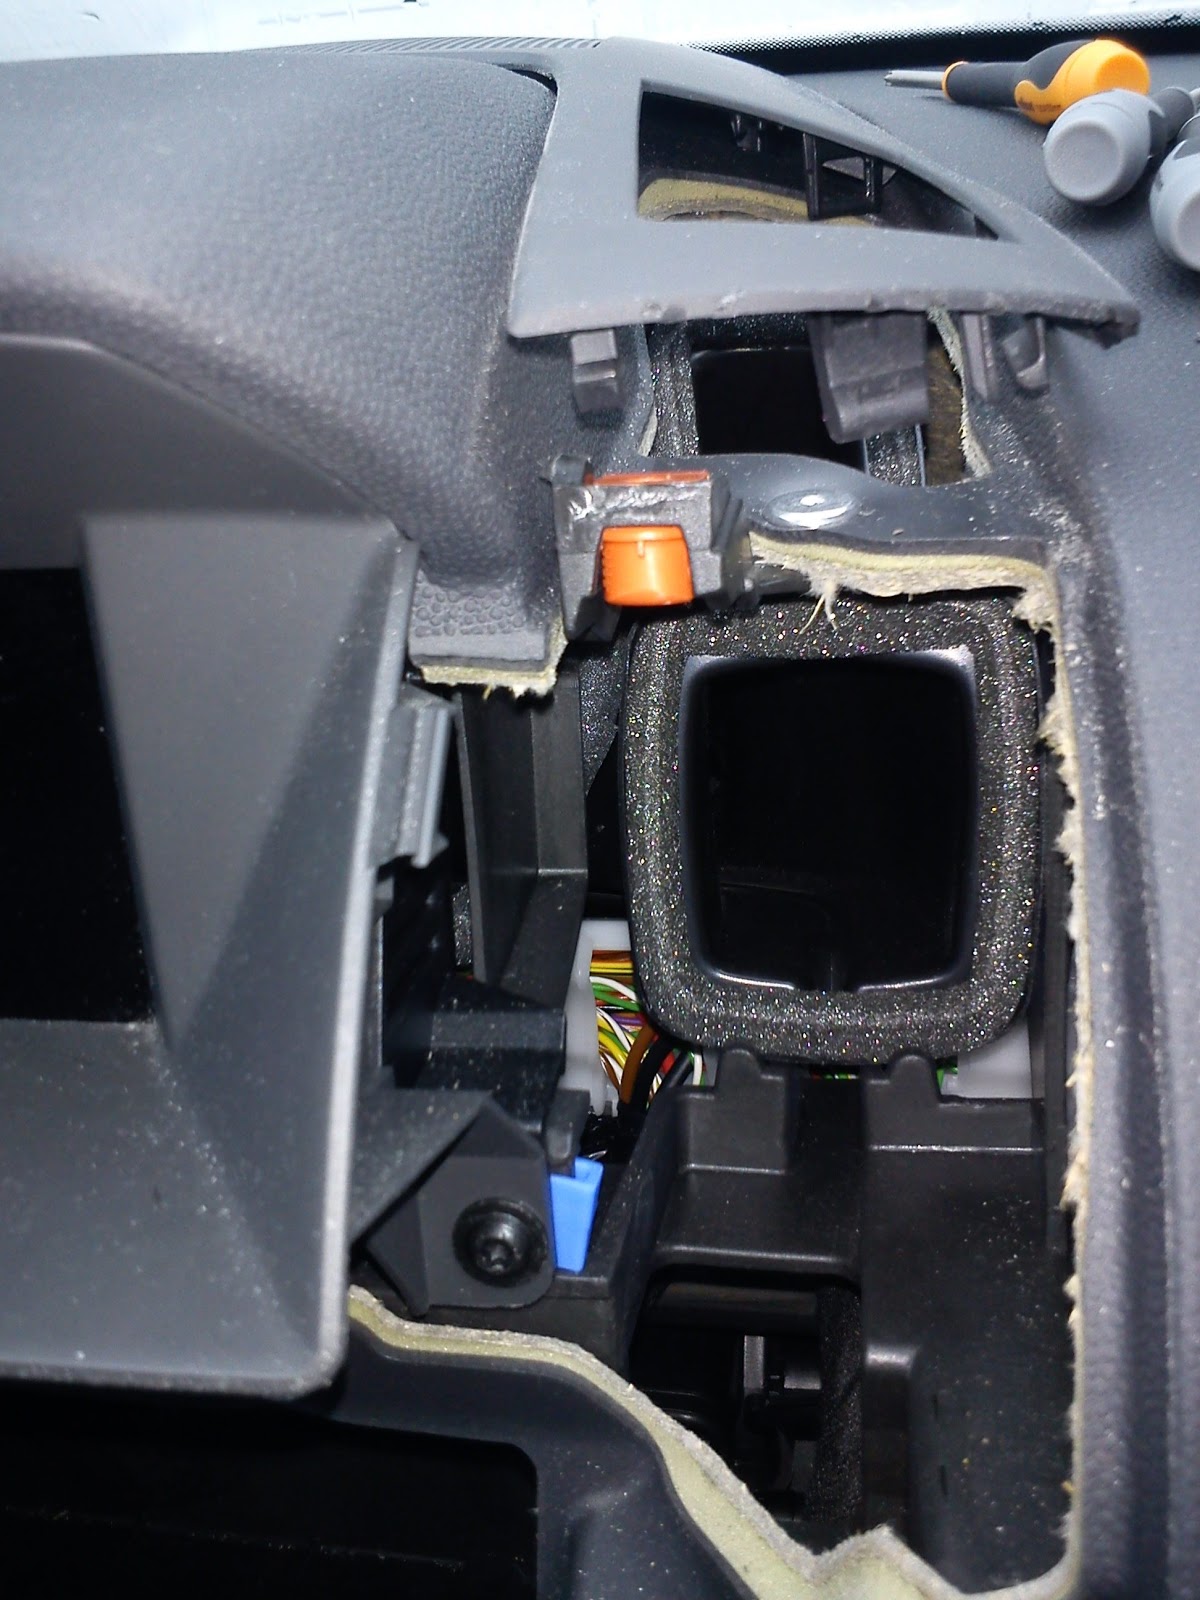
6) Once you have done this, slide the front fascia forward and remove the power cable from the back of the hazard light control.  Again be careful doing so, there's a locking mechanism.


On a side note the Top Grill aka 5th speaker in some cars can be found underneath the grill at the centre of the top of the Dashboard.  This can be opened by putting in a flat screwdriver and popping it up.
Unfortunately my car doesn't have anything installed here as seen by the 2nd following photo!
Oh well - some forums state this is a problem for some Parrot kits.


Removal of the MFD (Multi-Function Display) Display screen

The MFD screen should be removed as it helps in hiding some of the ISO cables in my opinion.
1) This is held down by 2 screws (bottom)
2) This can then be slid out and the connecting (locked) cable removed from the back


Removal of the 'Bottom' Centre Console (more specifically the Gear-stick  Diagnostic Test Socket Cover and Ash Tray)

 1) Pop in a flat screwdriver under the cover of the 'ash tray' and pop it up.
     Under here you have the 12v Ignition Live connector needed later (read on...)
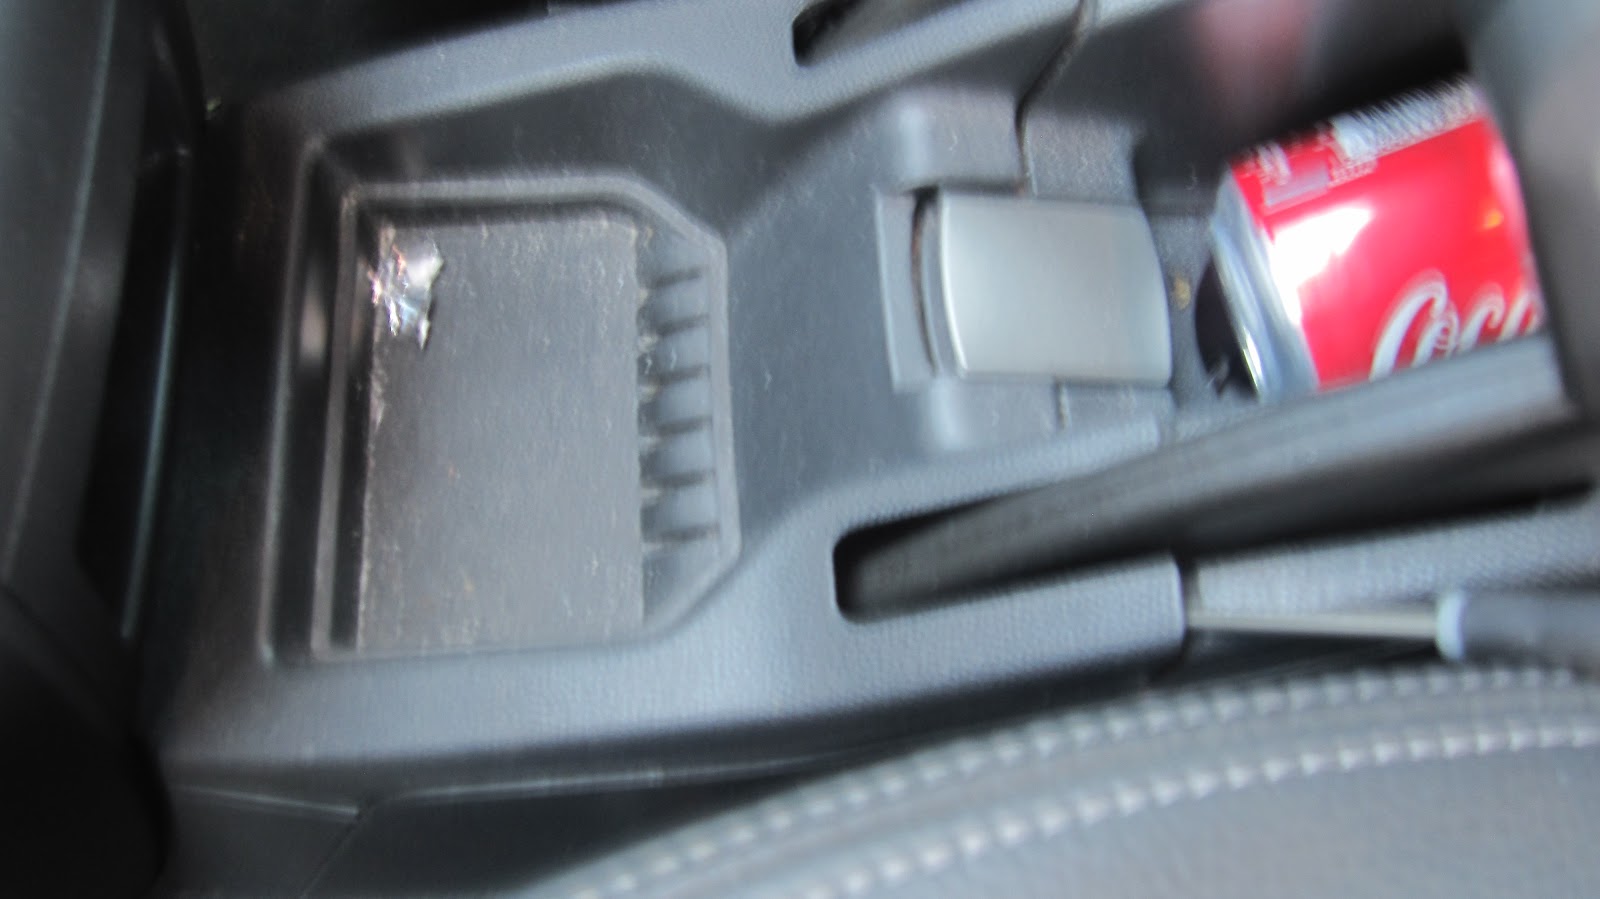

2) Using your finger pop it into the hole underneath the gearbox and pull down (with a bit of force)

3) Inside here you will find the Diagnostics Test Socket and 2 screws holding the gearstick in.

4) Once the screws have been removed the gearstick cover can be pulled back and 'slightly' out of the way

Removal of the Glove box

This will need to be removed as the back area is perfect for storing the blue control box.
1) Underneath the glovebox is a panel that needs removing first.  2 retainer clips hold this in place which can be removed using either your finger or a flat screwdriver.
2) Once done slide the panel out and store it out of the way


3) At the bottom you will find 2 T20 screws that need removing
Kinda a good thing I took the glove box out, Notice the leaflet floating about which got BEHIND the box.  Now if only that was a crisp £50 bank note!

4) Next open the cover of the glove box and you will find another 2 T20 screws that need removing, one in each corner.


5) Once this has been done the glove box can be gently slid out.
6) Remove the power cable (remembering which way round it goes - don't want to pop the bulb when replacing do we?)
7) Again store the glove box out of the way.


Removal of the Side Pillar Column

Not an essential step but as I wanted to mount the microphone high up by the rear-view mirror, I did it to store the relevant cable.

1) Check that the side pillar DOES NOT contain an air-bag. (Air bag picture usually on the cover in the next photo.)  Supposedly you can still do the following but be careful
(Disclaimer I don't accept any responsible should anything break or the air-bag is activated...)
2) Pop in a flat screw driver into the rectangular cover and pop it slightly out.
3) Using your hand put it out (it's a massive retainer clip!)
4) The side column can then be pulled down and out of place.
5) Again store out of the way.


I think that's all of the preparation you need to know.
Read the next post of the blog to see how everything is installed from here....

Installing Parrot Mki9100 Bluetooth Car Kit (in Vauxhall Zafira B) Pt2 - The Shopping List

Unfortunately although I took lots of pictures during installation I either:
* Didn't take any before (showing how 'messy' and how many components need to be installed.)
* Somehow lost them...
Anyway here goes (with some stock Google images, which I will replace with my own if I come across them):

The Kit itself


The removal key


The SOT-122 Cable
(See how big/messy it can get yet?)

And the MOST helpful book ever - The specific Haynes Manual for my car

On a side note, You might wanna get a few tools (if you don't already have them lying around the place...)
I ended up using :
* T20 Star-Bit screwdriver (ideally magnetized!)
* Flat-ended Screwdriver (should have been a plastic spatula.)
* Torch
* Cable grabber/pick up tool
* 1 Flat crimp connector and the tool to fit onto the cable
* Cable Ties and other cable tidy accessories
* Pliers/scissors to cut of excess cable tidies
And maybe a few latex gloves or plasters incase...

Update: Actually I did take a couple of photos:

1st we have the kit and associated cables that need to be installed and hidden within the car.

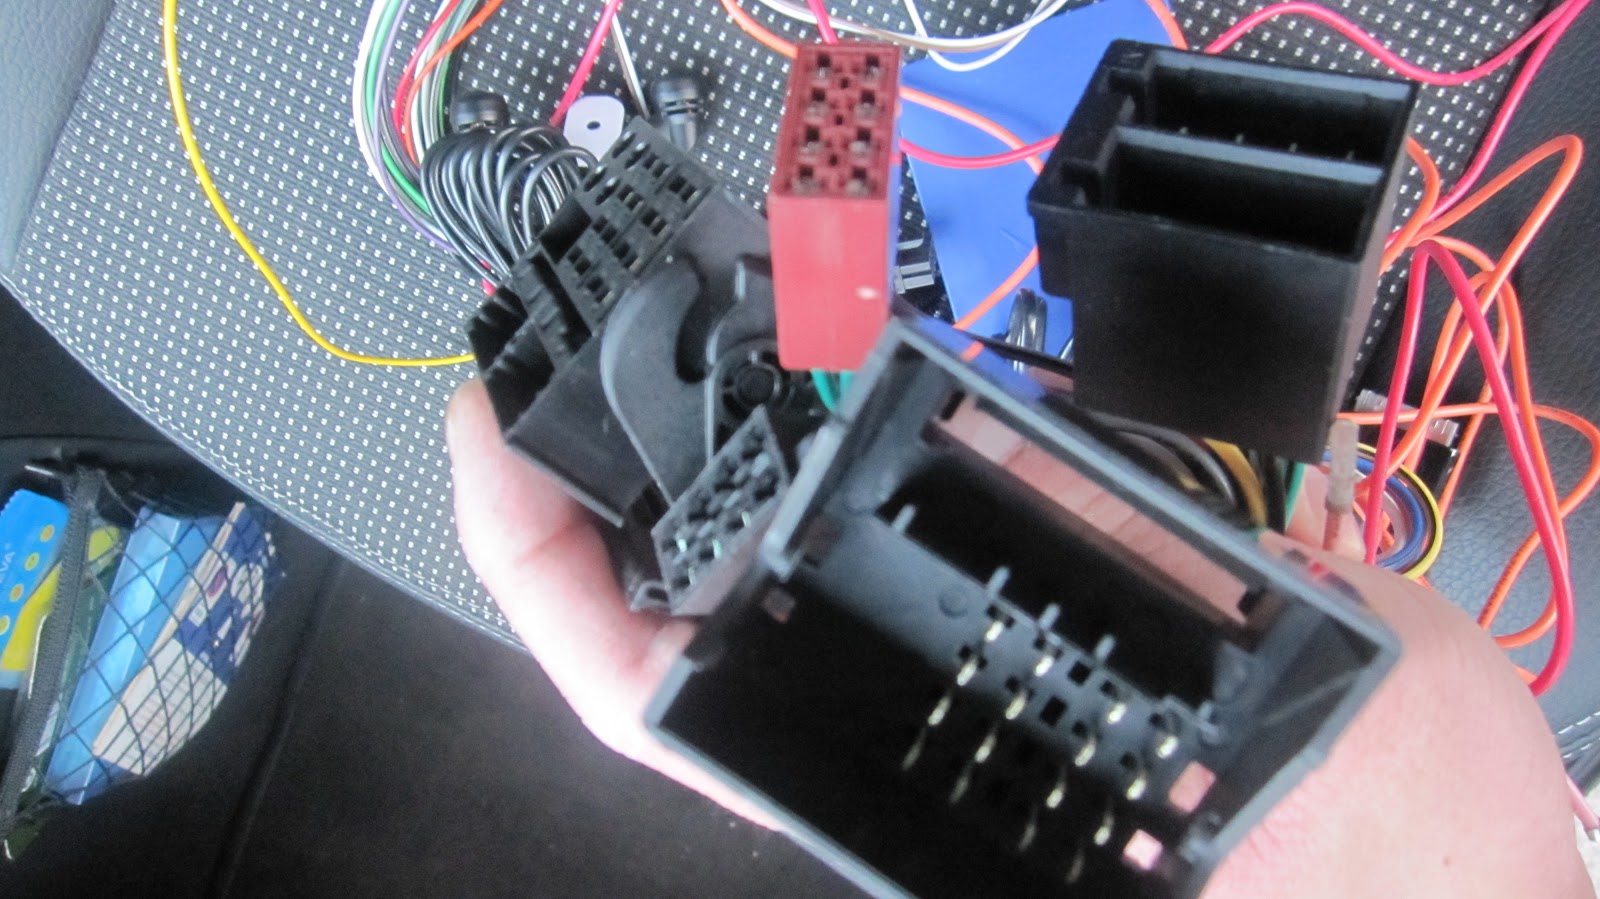
Grouped together is what the connections on the ISO SOT-122 cable look like

And lastly the famous 12v Battery, Ignition Feed which I read up as being problematic during my research.  Basically if not wired the correct way, the system wouldn't say 'Goodbye' and would drain the car battery.

Installing Parrot Mki9100 Bluetooth Car Kit (in Vauxhall Zafira B) Pt1 - Research

After researching and comparing prices for a parrot branded hard-wired Bluetooth kit for what must have been ages (months, years - you knows?) I finally bit the bullet and bought the relevant parts to install it.

Now why did I spent so long checking prices and doing other research you ask?
1) It's rather annoying hunting for the 'wired' hands-free kit for my phone (Nokia at 1 time, then Sony Ericsson after my upgrade) not to mention messy cables that kept getting caught by the steering wheel whenever I'm driving.
2) I do have a few portable Bluetooth headpieces but I seem to keep forgetting to charge these...
3) Each parrot kit seems to be hard to install (and I didn't want to give a garage another £30-£50 to install...)
    > Not to forget needing specific parts for different cars (that weren't included in the kits and needed to be bought separately.)
3b) Again due to specific parts needed for different cars I decided to go for the parrot kits instead of say the Bury branded ones as these adaptor cables etc would be easier to locate and buy.
4) Finally I love to experiment with things (and it also gets me more familiar with the car and how it all goes together.)

Anyway a couple of research topics I found:
The manufacturer's website (and associated support pages and forums.)
http://www.parrot.com/uk/products/all-products

According to their installer page, I need the PC000043AA ISO adaptor cable
http://dbinstall.parrot.com/pdf.php?adapter=PC000043AA&ck=MKI9100&lang=UK

Alternatively I found a massively CHEAPER version called the SOT-122(x) [£8.48 vs approx £30]
where (x) is substituted for a different letter to differentiate between slightly different wiring options
If I remember right S means FULLY wired which is needed if you fit the Unika kit (allowing fully integrated controls with the buttons on the steering wheel.)
As this would add another £100 on top of what I spent I went for the cheaper option (can always 'upgrade' in future, presuming I haven't got a new car by then!

See that the SOT122 cable isn't fully connected (only about 1/2?)


Apart from the kit I also needed to buy a Stereo removal key for the stereo already installed in the car.
As Vauxhall's love using bigger sized ones than the standard called 'Double Din' I had to make sure I bought the right one [another £0.99 added to the bill]
Or I could have been a cheapskate and used a coat hanger (or 2!)

Finally the kit itself had popped onto eBay from a Portuguese Shop/Seller at an amazing price so bullet biten!
[£80+Free P&P vs £129.99 Retail Prices from major UK retailer's like Halfords]
Total £89.47 *Bargain*

Anyway one of the Best sites that helped me through the installation was:
http://www.astraownersnetwork.co.uk/showthread.php?139944-How-to-install-a-Parrot-Bluetooth-Kit-(with-Pictures)
Which I have previously used/trawled through a bit....
Note that this refers to the Vauxhall Astra - surprised I couldn't find any for installation in a Zafira!
Although some parts are very similar (bar the glove box side, and subtle parts of the dashboard.)

Other little bits I found out was that the resulting cables(on the SOT one I think) had 2 loose wires:
One labelled 'Illumination/Dash Light' > not used on Parrots so wrapped up and stored away!
And the other Switched 12v > which I put a crimp connector on (and later attached to the bottom of the cigarette socket.)  This sends the signal/power to the parrot when you start the engine, basically turning the Bluetooth Car Kit on!


Friday, October 19, 2012

Return of Faulty Toshiba A500-1GL (Part 4)

Another 2 days pass (my own laptop stopped working as Windows lost part of its boot files! meaning I couldn't check it) and a few updates have been posted...

1st an email:
Dated Thursday 18 October 2012 8.06
Subject Toshiba Laptop Repair Service Order XXXXXXXXXX – Laptop Received
Dear Customer
We are pleased to confirm your Toshiba laptop has arrived at our repair facility.
You can track your repair progress online at: http://www.toshiba.co.uk/tracking

If you have any queries please contact us on 0844 847 8944 (for customers in UK only)

Regards
Toshiba Depot Repair Team
Please do not reply to this e-mail!

On their online tracker it shows:
18.10.2012 08:56In Process
18.10.2012 08:56Waiting for Part


Rather good to see that within 50 minutes of the email sent and this latest post, they have been able to FULLY test the system and determine that it is in fact FAULTY!

I wonder if it was just the Graphics card (and or the motherboard?)
And how hard it is to repair/swap?

So T-Minus 6 Working Days now!

Wednesday, October 17, 2012

Return of Faulty Toshiba A500-1GL (Part 3)

Another day passed.

So 2 working days passed since the collection of the laptop and the online Service Status has changed/updated to:
17.10.2012 15:59Received


Only 12 working days left to go before I have to call them and chase it up...
Let's see how long they take to test and confirm the laptop is faulty (due to faulty components etc.)

Tuesday, October 16, 2012

Return of Faulty Toshiba A500-1GL (Part 2)

Yesterday, UPS has been and gone to collect the packaged laptop so now begins the long-dreaded waiting game but then again after 2 years of having a faulty laptop, the earlier it gets sorted the better...

A little annoyed that Toshiba's tracking site from last night still shows

Model
A500-1GL
Please find below the following repair status of this Service Request:
Current StateDescription
PickupPickup
Please find below the history of this Service Request:
DateStatus
11.10.2012 15:52Announced
11.10.2012 16:00Service Case Exported
11.10.2012 16:00Service Case Received
15.10.2012 10:14Pickup


Surely it should be at the depot now rather than still waiting to be picked up?
Oh well...

Like I said the waiting game commences.
T-minus 10 days (-1 from yesterday) so 9 WORKING days left to wait

Sunday, October 14, 2012

Return of Faulty Toshiba A500-1GL (Part 1)

Fast forward a few months and I finally can be bothered to contact Toshiba RMA to have the laptop repaired (and have found my credit card statement to show warranty status.)

Called them Thursday 11th October 2012 14.42pm and spoke to a helpful Steve
He had confirmed that this laptop GFX card is NOT one of the one's affected by the Nvidia fiasco and the system would be picked up at my earliest convenience for return to their RMA centre.  Should a fault be found then usually within 10 working days this would be sorted and returned to myself.
However should a non warranty covered fault be found or not, a £83.40p charge would be applicable.
The RMA wouldn't be touched either if the system's hardware had been changed i.e. new HDD or RAM upgrade etc.

Wowee and he recommends me add to the original packaging in case it falls over in the UPS van.
OK then, Found a crap load of bubble wrap and gave it a good warm home (so excuses then!)
Now begins the waiting game...

Anyway before sending it off time to check the latest Reliability Monitor log and give the system a fresh install (need to get rid of any personal information etc.)

1st of all the Battery appears to have 'died' a bit - only about 1 hour use now on a relatively FULL charge


And regular crashes due to the graphics card.


Rather annoyed that after months of usage the Reliability Monitor hadn't even kicked in...


And a mental note of what driver versions are being used.


Finally it's time to wipe everything and start afresh, during which it crashed during the install process!
Too bad there's no indication what the FULL error code is but self explanatory it's due to the Graphics Card again!


It couldn't even last 5 minutes once booted into the Desktop


Finally if they try and say any damages is due to inadequate packaging I have a nice photo to show them!