This easily took over 3 hours to install if done in 1 go (personally I did it over a period of 4 days due to not enough sun light whenever I finished work and so parts of my dashboard were left off when I drove to work and back.)
First of all it was time to remove the front parts of the dashboard so that I could get the ISO connector removed of the back of the stereo (and install the SOT-122 cables and get that hidden away.)
Removal of the Stereo
1) Use the Double-DIN removal key and put it into the 2 sets of 2 holes on either side of the Stereo.
2) Pull outwards (if I remember right) and pull the stereo out, carefully.
3) The special ISO connector is 'locked' into place
> Simply put with both hands on the middle (feels like an unlock button) then the arm slides up and the ISO can be removed.
4) The aerial connector also has a locking mechanism done by a push on one of the corners.
]
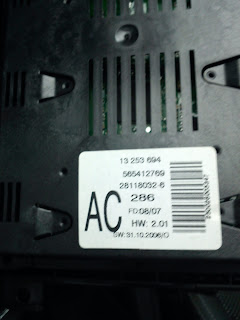
Photo of the top of the stereo (Hmm another Made in Portugal...)
Removal of the Heater Control
Once the stereo has been removed, the heater can be un-clipped and pulled out.
1) There's 2 sets of clips on the top then 2 on the bottom which will automatically un-clip when pulled slowly.
2) Remove both connecting cables (but dont yank, again they're locked in.)
Top 2 photos are the top and back of the Heater
The next 2 shows the stage up to this point.
Removal of the Front Dashboard Facial
1) Using a flat screwdriver (or plastic spatula if you don't want to leave any marks) pop a corner up.
2) Follow this through so that the top panel is removed (just the section above the center console is needed.)
3) Once this is done, the 2 air vents at the top should be pulled out (not locked down)
4) Underneath each of these should be a screw which needs removing.
5) And before I forget the 2 screws where the heater controls were (can be seen in the above photo, bottom corners.)
On a side note the Top Grill aka 5th speaker in some cars can be found underneath the grill at the centre of the top of the Dashboard. This can be opened by putting in a flat screwdriver and popping it up.
Unfortunately my car doesn't have anything installed here as seen by the 2nd following photo!
Oh well - some forums state this is a problem for some Parrot kits.
The MFD screen should be removed as it helps in hiding some of the ISO cables in my opinion.
1) This is held down by 2 screws (bottom)
2) This can then be slid out and the connecting (locked) cable removed from the back
Removal of the 'Bottom' Centre Console (more specifically the Gear-stick Diagnostic Test Socket Cover and Ash Tray)
Under here you have the 12v Ignition Live connector needed later (read on...)
2) Using your finger pop it into the hole underneath the gearbox and pull down (with a bit of force)
3) Inside here you will find the Diagnostics Test Socket and 2 screws holding the gearstick in.
4) Once the screws have been removed the gearstick cover can be pulled back and 'slightly' out of the way
Removal of the Glove box
This will need to be removed as the back area is perfect for storing the blue control box.
1) Underneath the glovebox is a panel that needs removing first. 2 retainer clips hold this in place which can be removed using either your finger or a flat screwdriver.
2) Once done slide the panel out and store it out of the way
3) At the bottom you will find 2 T20 screws that need removing
Kinda a good thing I took the glove box out, Notice the leaflet floating about which got BEHIND the box. Now if only that was a crisp £50 bank note!
4) Next open the cover of the glove box and you will find another 2 T20 screws that need removing, one in each corner.
5) Once this has been done the glove box can be gently slid out.
6) Remove the power cable (remembering which way round it goes - don't want to pop the bulb when replacing do we?)
7) Again store the glove box out of the way.
Removal of the Side Pillar Column
Not an essential step but as I wanted to mount the microphone high up by the rear-view mirror, I did it to store the relevant cable.
1) Check that the side pillar DOES NOT contain an air-bag. (Air bag picture usually on the cover in the next photo.) Supposedly you can still do the following but be careful
(Disclaimer I don't accept any responsible should anything break or the air-bag is activated...)
2) Pop in a flat screw driver into the rectangular cover and pop it slightly out.
3) Using your hand put it out (it's a massive retainer clip!)
4) The side column can then be pulled down and out of place.
5) Again store out of the way.
I think that's all of the preparation you need to know.
Read the next post of the blog to see how everything is installed from here....


Just wanted to thank you for taking the time to document this, have successfully installed a head unit with mic mounted on rear view as you described, you saved me a lot of time and frustration
ReplyDeleteNo problem, glad to help.
Delete